DIY Chunky Farmhouse Trim
I’m helping my Mom re-do her kitchen and living room area. It’s not a major renovation, just some paint and updating of the trim and hardware. This last weekend I installed some really chunky farmhouse trim in her kitchen and I thought I’d share it with you and show you how I did it.

The Prep Work –
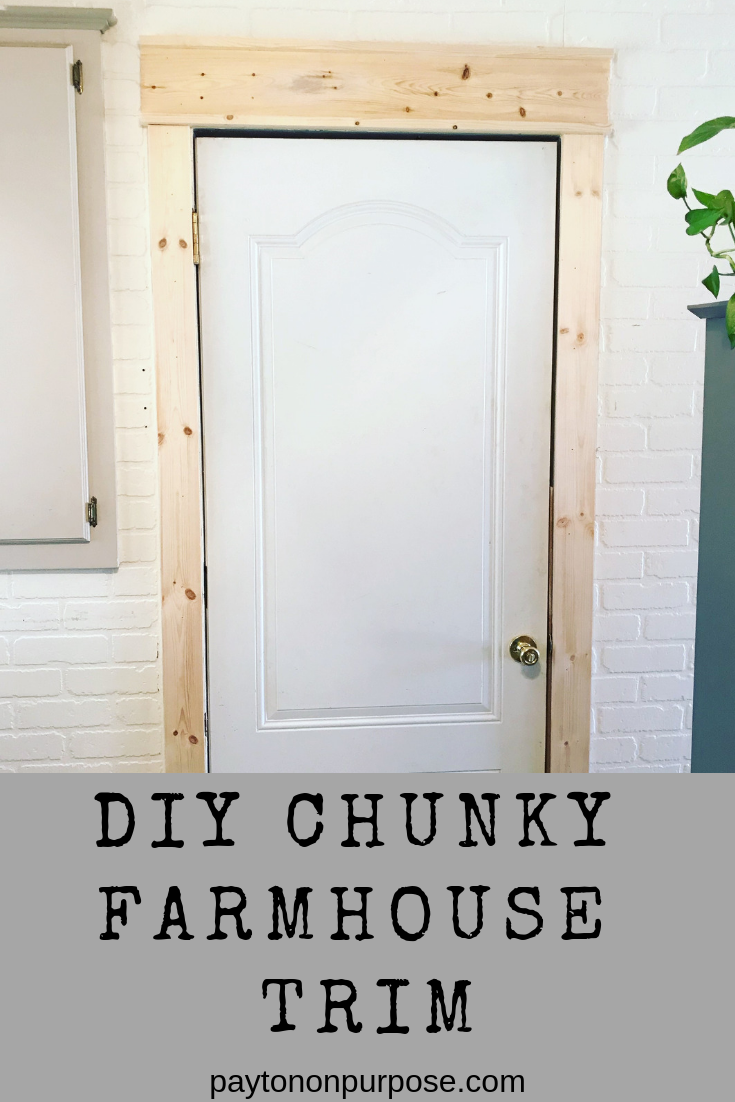
This is the door in her kitchen that leads out into the garage and it had trim once upon a time, but my mom’s golden retriever decided to snack on it. She had the trim replaced but it wasn’t quite the look she was wanting so here we are. Doing a complete trim tear out and makeover.
We started by taking out the existing trim with a hammer and pry bar. It came off pretty easy and then I used my sander to take the caulk down to the wall, so I had a clean surface to apply the new trim to.
Once it was sanded, I wiped it all down with a damp cloth and vacuumed to get all the remaining caulk and dust off.


The Materials & Installation –
The threshold, stop, and interior casing of the door were all intact and didn’t need replacing. I was just replacing the side casing and header casing. I measured the height of the door, cut my boards (1x4x8 white boards from Home Depot) and installed them using liquid nails and a few nails with my Ryobi 18-gauge brad nailer.

After the sides were installed, I measured the total width of the door and casing and cut my header pieces. Then I added another inch to that width so that my header would hang over half an inch on each side of the door (you can see this in the last photo). I used a 1x2x8 and a 1x6x8. Finally, I cut 2 pieces of the 1×2 so I could stack it on either side of the 1×6. You can see in the photo below.


I glued the 1x2s to the 1×6 using wood glue and a clamp to hold the pieces in place. Then I reinforced with my nail gun.
Once the header was all dry and put together, I added a layer of liquid nails to the back and installed it with my nail gun.

I installed trim throughout the kitchen and into the living room. I will post a full Kitchen reveal once it’s all finished and painted. I’ve also done a built-in dining nook in her kitchen and I’m excited to show you guys how I did that as well.
This entire project cost about $100 in lumber. Even though it’s not painted yet, it already looks so much better. I was worried it would make the room look smaller, but it actually had the opposite effect. I can’t wait to see it all painted!
Do you have any questions about this trim? It was so easy to install and only took about an hour to do this entire wall. Let me know if you decide to do this little project and update your trim.
Happy Building!
About The Author
Payton
Related Posts

$100 Bathroom Remodel
Oh boy. This is a makeover to top all other makeovers that I’ve done…
May 19, 2020
$100 Closet Remodel
The real slim shady song has been STUCK in my head all day. I have…
April 18, 20202 COMMENTS
Leave A Comment

christina | 20th Dec 18
This is amazing! I would love to try this 🙂
– http://www.youthofthesun.com
Payton | 16th Jan 19
Let me know how it goes! I’d love to see a photo if you end up doing it!