DIY Entryway Coat Hooks
DIY Entryway Coat Hooks – A how-to guide
Today’s Blogmas post is going up pretty late. I still made it before midnight so it totally counts! It has been crazy over here. I was supposed to be in Dallas for a work trip today and tomorrow but I canceled it because the weather is supposed to get bad. Hope you stocked up on groceries if you live around here! The store was a madhouse last night. Anyway, let’s get down to the building! That’s why you’re here after all! This simple DIY Entryway Coat Hook project only takes about an hour to complete!
In our entryway, we don’t currently have anywhere to hang our bags or coats. We have a coat closet in our hallway but it would be nice to have something a little bit more accessible. The diaper bag and my purse usually end up on our dining table and our console table is giant so there isn’t much room for coat hooks but I finally thought of a solution that works!
In our dining room, we have these two half walls. My writing desk sits next to one and then the other one is empty. Today I’ll explain to you how I optimized this space by using a really cute DIY coat rack!

The Build:
I started by getting a 1x6x6 board at home depot. Then I brought it home and cut it down to 32 inches. I also bought some really cute black hooks. We have the same hooks in our master bath and they are pretty heavy duty. I will have to use shorter screws than what came with them because my board is only ¾ inch thick.
After I cut the board, I sanded down the edges and then distressed it a little bit with a hammer and chisel. It really gives the stain some dimension when you do this. Then I positioned all my hooks and marked my holes to drill the pilot holes. You always need to drill pilot holes so that the wood doesn’t split.

The Finish:
I put a coat of stain on and then wiped it off. Then I used a coat of poly and let it all dry. I attached a photo of my favorite poly to use. It dries so fast!
Once it was done drying, I screwed my hooks on and then took it in the house to hang up!

The Installation:
You’re going to need a level, a stud finder and some 3 inch Spax screws. I don’t mess around when I hang stuff on the walls. I always attach my shelves and hooks directly into the studs.
Once I found the studs I marked them with a pencil and put my board up on the wall to mark those pilot holes as well. I drilled those holes and put my board up. I made sure one last time that it was level and then attached it to the wall.
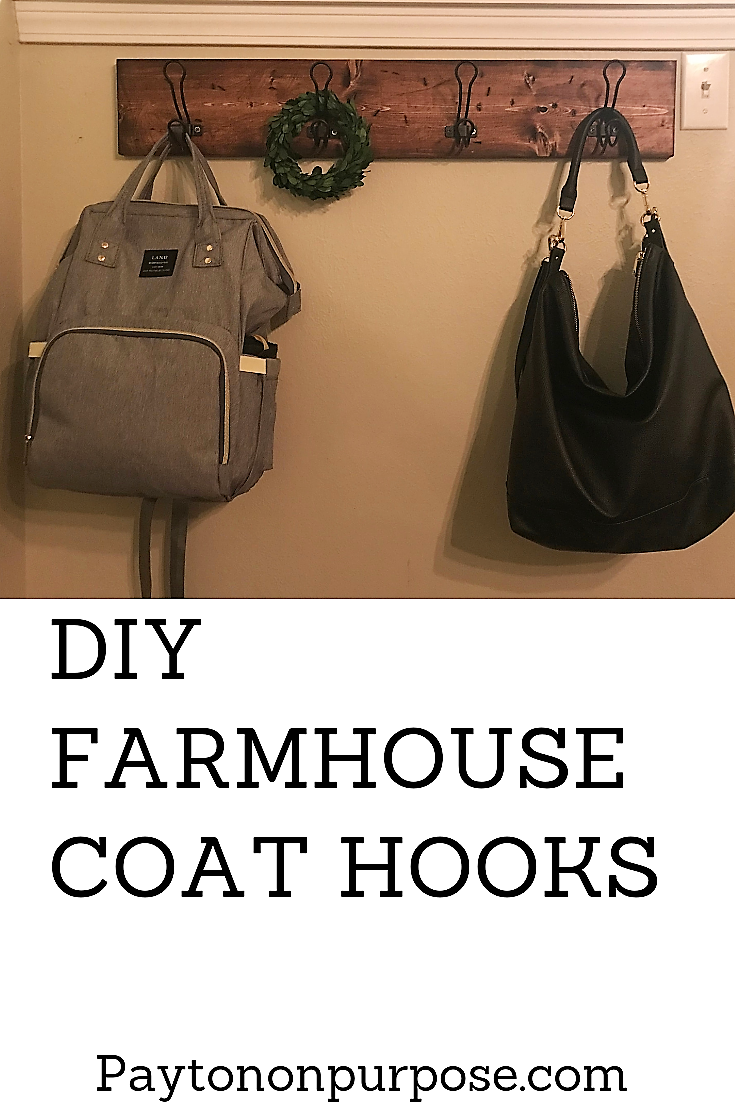
Then I hung my purse and Isla’s diaper bag on it and this cute little wreath! I absolutely love how it turned out! This entire project was under $25-That includes the wood (I have enough left over to use for another project), screws, and hooks. I already had the stain, poly, level, stud finder and drill. It took me about an hour start to finish but most of that was dry time. It would even make a cute gift for someone and would also look great in a bathroom.

What other DIY projects would you like to see? I’m all about trying to maximize space since our house isn’t very big and I love the idea of every single thing in your home having its own place. Before my hooks, my purse was just wandering around aimlessly. I jest.
Happy building, loves!
About The Author
Payton
Related Posts

$100 Bathroom Remodel
Oh boy. This is a makeover to top all other makeovers that I’ve done…
May 19, 2020
$100 Closet Remodel
The real slim shady song has been STUCK in my head all day. I have…
April 18, 20202 COMMENTS
Leave A Comment

Marilyn | 7th Dec 18
This looks very nice!
Payton | 7th Dec 18
Thank you!